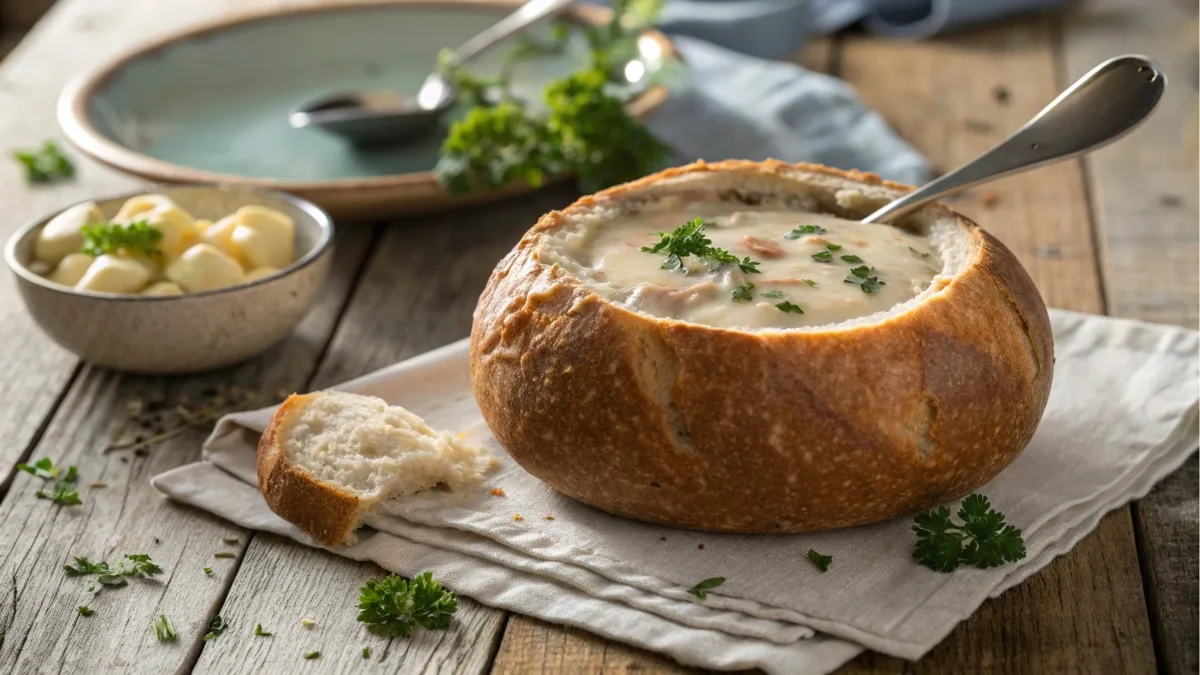
Picture this—warm, crusty sourdough bread shaped into a bowl, filled to the brim with hearty soup or a creamy chowder. Sounds irresistible, right? Sourdough bread bowls are more than just delicious; they’re functional, too! They make the perfect edible containers for your favorite meals, all while providing that satisfying chewy texture and signature tangy flavor. If you’ve been curious about these golden edible vessels and want to learn all about them (plus how to make your own), you’re in for a treat. Let’s get started!
Table of Contents
What is a Sourdough Bread Bowl?
If you’re wondering what exactly makes a sourdough bread bowl so special, let’s break it down. A sourdough bread bowl is essentially a round loaf of bread, baked from tangy, fermented dough, and hollowed out to serve as a container for soups, stews, dips, and sauces. Unlike your run-of-the-mill bread, sourdough gets its distinct texture and flavor from natural wild yeast and lactic acid bacteria during the fermentation process.
But what sets the bread bowl apart isn’t just taste—it’s pure brilliance in design. It acts as both a serving dish and part of the meal. It’s eco-friendly (no dishes to wash afterward!) and delivers a cozy, rustic experience that’s hard to top.
Origins of Sourdough and Bread Bowls
Now, where did these beauties come from? Sourdough itself has ancient roots. This beloved bread variety appeared thousands of years ago, long before factory-made yeast was even a thing. Ancient Egyptians are credited with discovering how to use fermented dough, and sourdough has been a staple in numerous cultures since then.
When it comes to bread bowls, they’re a little newer on the culinary scene, but they still have quite the backstory. The concept of serving food in bread dates back to medieval Europe, where large, flat rounds of bread (called trenchers) were used as plates. Once the meal was over, the bread plate could be eaten too. Fast forward to modern times, and sourdough bread bowls grew in popularity in places like San Francisco, where sourdough culture is practically a religion.
Why Sourdough Bread Bowls Are Popular
You might be asking, “What’s the big deal? Aren’t bread bowls just… bread?” Not exactly! There’s a reason why sourdough bread bowls have a cult following. For starters, sourdough itself is in a league of its own. It’s got that satisfying blend of crispy crust and tender insides, all accompanied by its signature tangy kick. When paired with soups like clam chowder or creamy tomato, it’s downright magical.
And let’s not forget the Instagram-worthy appeal of it all! There’s something comforting and aesthetic about cozying up with a perfectly baked bread bowl and your favorite filling. Plus, for foodies who are also eco-conscious, the edible “bowl” solves the issue of waste while adding flavor to your meal.
“Sourdough bread bowls aren’t just food; they’re an experience. They have personality, texture, and a story baked right into them.”
Ingredients Needed for a Perfect Sourdough Bread Bowl
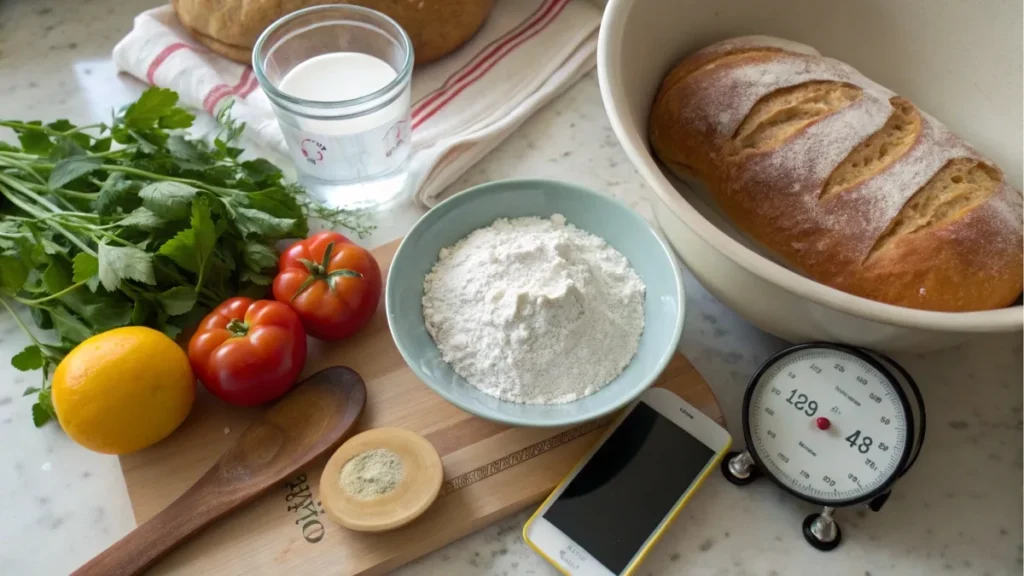
Now that you’re eager to dive in, let’s chat about the ingredients. No need for a fancy pantry here—just some basic, high-quality ingredients and a bit of patience are all you need to whip up sourdough bread bowls.
Essential Ingredients
Here are the basics for making your own sourdough bread bowls:
- Flour – Bread flour works best here because it gives structure, chewiness, and elasticity to your dough. You can combine it with whole wheat flour for added texture.
- Water – Filtered water (chlorine-free) is a must to keep the fermentation process happy and healthy.
- Salt – Enhances the flavor and strengthens the dough structure.
- Sourdough starter – The star of this show. If you don’t have one, you’ll need to make it or borrow from a friend.
These essentials work together to create the charming tanginess and crusty exterior you love. But we can’t stop there, can we?
Optional Add-ins for Flavor Enhancement
While the classic sourdough recipe is perfect on its own, you can personalize your bread bowls by adding a few extras:
- Herbs – Rosemary, thyme, or oregano can infuse your bread with earthy undertones.
- Seeds – Sprinkle sesame, chia, or sunflower seeds on top for added crunch and nutrition.
- Garlic – Who doesn’t love garlic-infused bread bowls? Mix some finely chopped or roasted garlic right into the dough.
Feel free to experiment! Your bread bowls, your rules.
“A little sprinkle of seeds or dash of herbs can take your sourdough bread bowl from everyday to extraordinary!”
The Secret Ingredient? Patience
Making sourdough is as much about timing as it is about technique. And here’s the truth—it’s not a quick process. But that’s the charm, right? The slow fermentation process gives sourdough its one-of-a-kind flavor and texture. It’s the kind of bread that rewards you for waiting. Consider it a meditation in dough form. After all, baking something this delicious—something that doubles as a bowl—is totally worth the effort.
By now, you might be thinking, “Okay, I’m ready. When do we bake?” Don’t worry. We’ll be getting into the nitty-gritty of shaping, baking, and troubleshooting dough in the next part! But first, take a moment to appreciate how wonderful and versatile sourdough bread bowls truly are. They’re as much a feast for the eyes (and the gram) as they are for the stomach.
Hungry yet?
The first part of your article on sourdough bread bowls is ready to go! Let me know when you’re ready for the next part, and I’ll dive right into it.
Step-by-Step Recipe for Making Sourdough Bread Bowls
Alright, it’s time to roll up your sleeves and get baking! Making sourdough bread bowls might seem intimidating, but trust me—once you break it down step by step, it’s totally doable. Plus, there’s nothing better than the sense of accomplishment you feel when pulling your golden-brown bread bowls out of the oven. Let’s jump into it!
Preparing the Sourdough Starter
First things first, your sourdough starter needs to be in top-notch shape. If you’ve been nurturing one for a while, make sure to feed it the night before so it’s bubbly and active. For those who are new to sourdough, creating a starter from scratch involves mixing equal parts flour and water and letting nature (aka wild yeast in the air) do its thing. This takes about a week of regular feeding, so plan accordingly!
Once your starter is lively and full of bubbles, you’ll take a portion to use in the dough—it’s like borrowing a little magic for your bread. Don’t worry about the portion left behind; you’ll keep feeding and growing it for future bakes.
“Think of your starter as the heart and soul of your sourdough bread—care for it, and it’ll reward you with incredible flavor.”
Mixing and Kneading the Dough
Now for the fun part—turning a few simple ingredients into dough.
- Combine your ingredients: Mix your sourdough starter, flour, water, and salt in a large bowl. Stir until everything comes together in a shaggy dough.
- Autolyse (fancy term for ‘letting it rest’): Cover the dough and leave it for about 30 minutes. This rest period allows the flour to absorb water, making kneading easier and yielding a better texture.
- Knead, but gently: Sourdough bread benefits from a technique called “stretch and fold” rather than aggressive kneading. Every 30 minutes over about 2 hours, grab one side of the dough, stretch it up, and fold it over the rest. Do this a few times, rotating the bowl. This builds strength and structure in the dough.
Shaping and Baking the Bread Bowls
Once the dough has bulked up during proofing, it’s time to shape and bake your bread bowls.
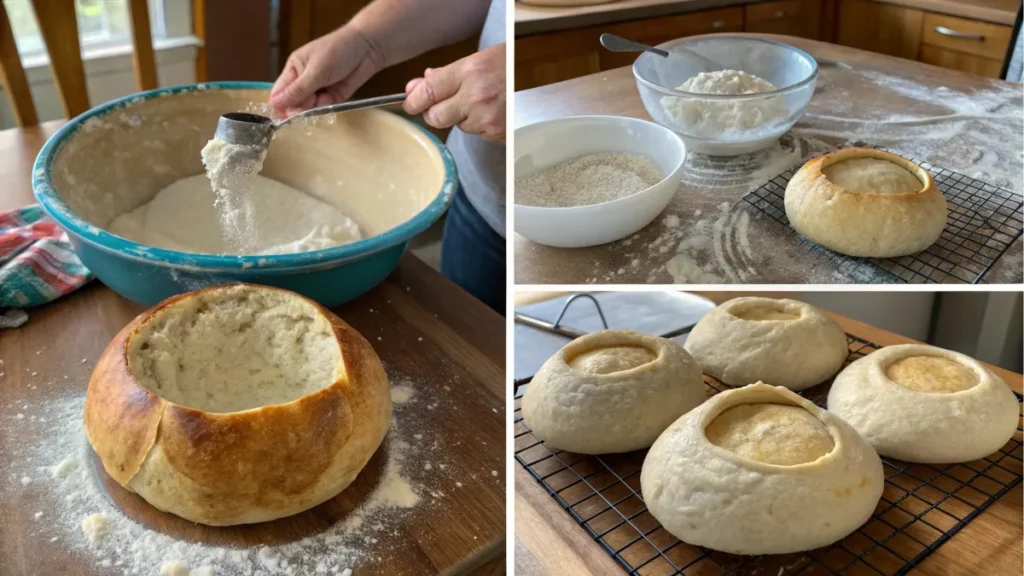
- Divide the dough: Depending on your desired size, divide the dough into 3–5 portions.
- Shape into rounds: Tuck the edges under to create smooth, round balls. Place them seam-side down on a baking sheet.
- Final proof: Cover the dough balls with a clean towel and let them rise again until they’ve puffed up slightly—this could take 1–2 hours, depending on your kitchen temperature.
- Bake to perfection: Bake at 450°F (232°C) for about 25–30 minutes. You’re looking for a golden-brown crust that crackles when tapped.
Once cooled, hollow out the center of each loaf with a serrated knife and voilà! You’ve got yourself some homemade sourdough bread bowls.
Best Ways to Serve Sourdough Bread Bowls
Now that your bread bowls are ready, let’s talk fillings. What’s going inside these edible marvels? The possibilities are endless, but here are some popular and creative ideas. If you’re looking for the perfect soup to pair with your bread bowl, try this hash brown potato soup—it’s creamy, comforting, and complements the tangy sourdough beautifully.
Popular Soup and Salad Pairings
- Clam Chowder: There’s a reason this is a classic—it’s rich, creamy, and pairs beautifully with sourdough tanginess.
- Tomato Basil Soup: Tangy bread meets tangy soup. Enough said.
- Loaded Potato Soup: Think cheesy goodness with crispy bacon crumbles. Heaven.
- Caesar Salad: Scoop into your bread bowl for a fresh, crunchy twist.
Creative Recipe Ideas for Bread Bowl Fillings
Feeling adventurous? Try these out-of-the-box ideas:
- Mac and Cheese: Yes, gooey mac and cheese inside a bread bowl is as indulgent as it sounds.
- Chili: Perfect for game day with a dollop of sour cream and shredded cheese on top.
- Breakfast Bowl: Stuff with scrambled eggs, sausage, and hash browns for a hearty start to your day.
For another cozy and flavorful option, consider ladling in some chicken taco soup. The bold spices and rich broth make for an irresistible combination.
“The beauty of a sourdough bread bowl? It’s a blank canvas, and you’re the artist. Get creative!”
Common Problems When Making Sourdough Bread Bowls
Not everything will go perfectly on your first try, but that’s okay! Here are common issues and how to fix them.
Bread Bowls Are Too Dense or Heavy
This often happens if the dough is underproofed (didn’t rise enough), or you added too much flour. Always check your dough for that soft, pillowy feel before baking.
Dough Doesn’t Rise Properly
Your sourdough starter might not be active enough. Feed it and wait until it’s bubbly before using. Temperature matters, too—if it’s cold in your kitchen, the dough will rise more slowly.
Bread Bowl Cracks or Tears During Baking
Cracks are often a sign of underdeveloped gluten or not enough steam in the oven. Try placing a pan of water in the oven while baking to help keep the crust moist.
Practical Solutions for Common Issues
Here are some tips to help you ace sourdough bread bowls on your first try:
- For Dough Consistency: Use a kitchen scale to measure your ingredients meticulously. The dough should be tacky but not sticky.
- For a Crispy, Golden Crust: Bake directly on a preheated pizza stone or cast-iron skillet for that bakery-style crust.
- Troubleshooting Rising Problems: If your dough refuses to rise, experiment with giving it a warm spot—like near the oven or wrapped in a towel with a hot water bottle beneath.
Storing Your Sourdough Bread Bowls
If you have leftovers (though it’s highly unlikely), proper storage is key to keeping your bread bowls fresh.
Short-Term Storage Tips
Wrap cooled bread bowls tightly in plastic wrap or store them in an air-tight container. This will keep them soft for 1–2 days.
Freezing Bread Bowls
For longer preservation, freeze the bread bowls individually. Before serving, simply reheat them in the oven to restore their texture.
Health Benefits of Sourdough Bread
Ever wondered if sourdough is good for you? Spoiler alert—it is!
Rich in Nutrients and Easier to Digest
Sourdough is full of iron, B vitamins, and magnesium. Plus, thanks to the fermentation process, it often feels easier on the stomach compared to conventional breads.
Lower Glycemic Index
Looking to maintain steady blood sugar levels? Sourdough bread tends to have a lower glycemic index than regular bread, making it a better choice for many people.
Frequently Asked Questions About Sourdough Bread Bowls
- What is the best bowl for making sourdough bread?
A banneton or proofing basket is ideal for shaping and supporting sourdough bread as it rises. - Are Panera bread bowls sourdough?
Yes, Panera’s bread bowls are made from sourdough, giving them a tangy flavor and sturdy texture. - How to shape a sourdough bread bowl?
Shape the dough into a tight ball, ensuring a smooth surface, then let it rise in a floured banneton. - Why is sourdough bread not fattening?
Sourdough is lower in sugar and has a lower glycemic index, which can aid in better digestion and weight management.
Final Thoughts on Sourdough Bread Bowls
Honestly, making sourdough bread bowls is one of life’s simple joys. Not only do you get to enjoy delicious, tangy bread, but you’ve also got a functional, eco-friendly way to serve your meals. Plus, the creative possibilities are endless—from soups to salads to decadent mac and cheese.
“Homemade bread bowls aren’t just food—they’re a memory in the making. Share them with loved ones and create something special together.”
For more cooking inspiration, follow us on Facebook: Recipes Gather Facebook Page.


4 thoughts on “Mastering Sourdough Bread Bowls: A Complete Guide”